Using Turf Cutter
Connect Toolkit
Some polling districts have a large number of houses, some homes are very spread out, and some are set up in a way that is confusing; all of these can make for a difficult canvass for your volunteers. The Turf Cutter tool allows you to create tailored lists for your volunteers that target individuals by a specific location, rather than just by polling district.
The distributed canvassing tool allows you to allocate properties based on the location of the canvasser, but sometimes that is not convenient. If you want more control over who canvasses which houses then turf cutting is the solution.
1. Begin on the My Voters database
The My Voters database is where you will find all registered voters for your constituency.

2. Access your list
You can begin by creating a list from scratch or loading a saved list from a folder
- For information on how to create a list for talking to voters, take a look at our guide on creating lists. For canvassing we recommend using the Doorstep Canvass target pool which uses your past canvass data, marked register and postal voter lists as well as demographic modelling to send you to the households that are most likely to vote and be open to our message. It also helpfully excludes student halls and care homes and anyone you've spoken to recently
From the My List page, click on the Cut Turf icon

3. Go to Turf Cutter
-
On the Turf Cutter page, use the plus (+) symbol to zoom in and the minus (-) symbol to zoom out, or you can use the slider control for zooming
-
You can choose between map view, and satellite view using the little layered cube simple in the top right
-
The box above that let's you switch to full screen mode to give you more room to work
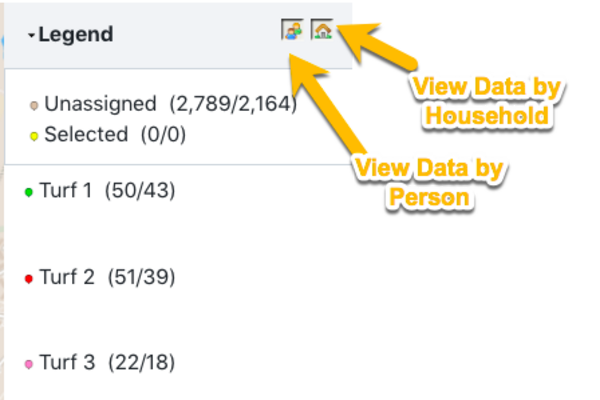
4. Select your view
From the menu, select how you want to view households by selecting the images of People, Doors, or Both.
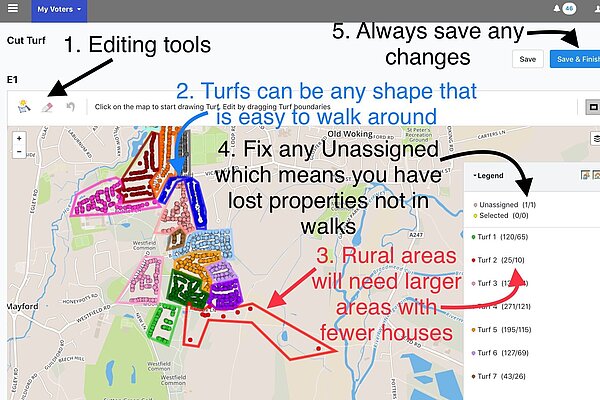
5. Create turfs
- To start creating your first Turf, click on the map to choose a place to start, then outline the area you want to select by clicking your mouse at various points around the area
- Continue clicking points to draw the geographical limits of the group you want to apply to the Turf
- Finish your turf by clicking on the first dot you created. This will close off the turf
6. Continue defining all the turfs
You can create up to 30 Turfs, or sets of voters, from one list.
7. Click Save.
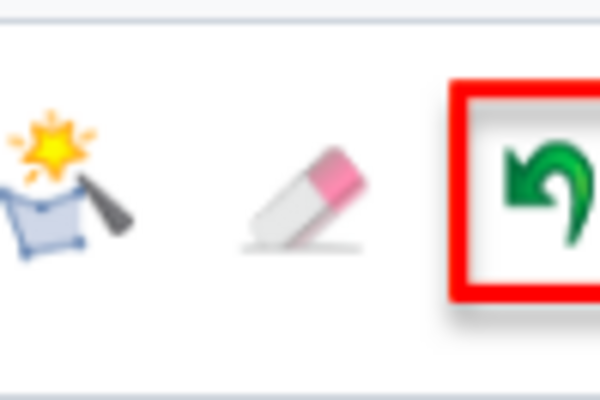
8. Editing your turfs
If you want to undo your most recent action, click the Undo button.
You can erase all your work by clicking on the eraser.
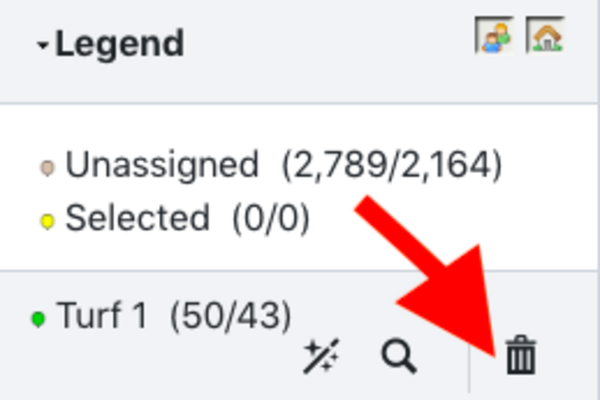
To delete your current Turf, highlight it in the Legend box and click the Dustbin symbol. This will clear your highlighted Turf
9. Generate your lists!
- When finished, click Save & Finish
- Save your list into a folder, give it a name and a description
10. You can retrieve your list of turfs at any point by accessing the MyTurfs page, from the main mane of the My Voters side of the database
From this tool, you can send your lists to the printer or send them to MiniVAN for canvassing. You can also edit the search behind your turfs by going to the folder it is saved in and editing the search criteria.