Getting Started with Lighthouse
Lighthouse Training - Module 2
Time estimate: 10 minutes
Topics: Lighthouse, Lib Dem systems
Lighthouse is set up to be as user-friendly as possible, so hopefully navigating is simple and intuitive.
When you are first given access, you will receive an email with instructions on how to set up your account.
If you are a superuser, you will need to contact HQ at membership@libdems.org.uk to be given access. If you are a regular user, your superuser will be able to set you up on the system.
Logging in
Step 1
Open your web browser. In the address bar at the top of the screen, enter the following URL: https://Lighthouse.libdems.org.uk
Step 2
This will take you to the login page, where you will need to enter your email and password. Make sure you use the email address you use for your membership.
When you log in you will be taken straight to the dashboard. You will learn about the dashboard and its purpose in a later section.
How to set up an authenticator app
What is an authenticator app?
When you log into Lighthouse, you will notice that it sends you an email containing a one-time passcode in order to confirm your identity. This is known as two-factor authentication and helps Lighthouse double-check that you are who you say you are, before allowing you access to the system.
Authenticator apps provide an alternative form of two-factor authentication and allow you to generate the passcode on your phone instead.
You can use most authenticator apps available on the Apple App Store or Google Play Store.
The most common ones are:
- Google Authenticator
- Microsoft Authenticator
- Lastpass Authenticator
- Authy
You can just download them the same way you would download any other app.
Step 1
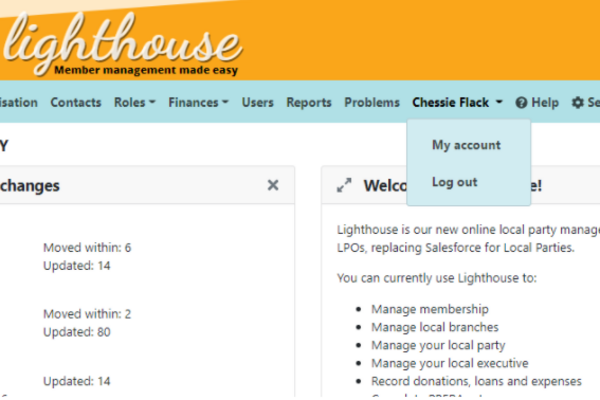
After logging into Lighthouse, you will be directed to the Dashboard page. Click on your name in the blue menu at the top, and a drop-down menu will appear. Click on “My Account”.
Step 2
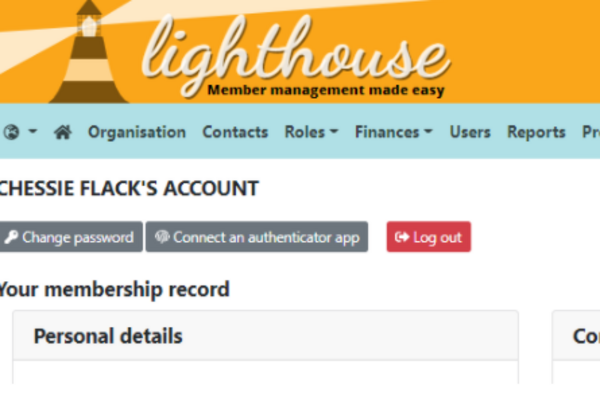
You will be directed to the Account page, where you can see all the details associated with your Lighthouse account. To connect an authenticator app, click “Connect an authenticator app” at the top left of the page.
Step 3
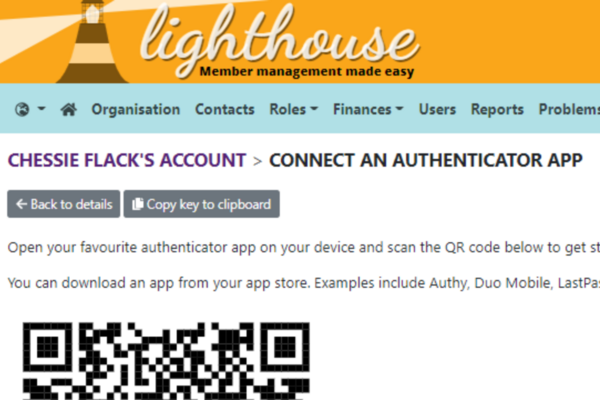
You will be directed to the “Connect an authenticator app” page. Here you will see a large QR code on the screen.
Step 4
Open up the authenticator app on your phone, and select “Add account”. The app will prompt you to scan the QR code on your computer screen with your phone. You may also be asked to enter a name for the account - just type “Lighthouse”.
Step 5
The next time you log in to Lighthouse, you will be prompted to type in a code from your authenticator app. Open the app, and navigate to your saved “Lighthouse” account. The code will display on the screen for 30 seconds. Type this code into Lighthouse, and you will be allowed to log in.
This code changes, so you will need a new code each time you log into Lighthouse. If you are not using a shared computure, you can click 'Allow login without a code on this device', which means for 14 days, you won't need two factor authentification on that device. You should only use this feature if you are the only person who uses your device.
Navigating around Lighthouse
After logging into Lighthouse, you will see a variety of options in the blue menu bar at the top of the screen. Here is what each one does:
Globe Icon
- This allows you to navigate between the local/regional parties you have access to. (Specific access is required for this)
House icon
- This will take you to your dashboard
Organisation
- View and edit the contact and bank details for your local party
Branches
- View a list of your local branches
- View membership data for your local braches
- Add or edit branches and branch codes
Contacts
- View local members, supporters and donors
- Add contacts to Branches
- Create or edit contacts
- Search and filter lists of contacts
Roles
- View, create and edit current member roles
- View previous years' member roles
- View terms of office for member roles
Finances
- View, create and edit donations, pledges and loans
- Submit PPERA returns
- Submit expenses
- View details of local party rebates
Users
- View a list of local Lighthouse users
- Add new local Lighthouse users (Superusers only)
- Edit user permissions (Superusers only)
Reports
- View a list of your saved custom reports
- Edit your saved custom reports
- View a list of standard reports
- Filter reports by type and creator
Your Name
- View your personal membership details
- Change your password
Help
- View more Lighthouse Guides and Geek Sheets
You might not be able to see all of these options. If you think you need to be able to see an option you can’t, contact your superuser to ask them to change your permissions.
Tasks
Tasks are quick and easy things you can do after each module to help practice what you've learned. Try them out and see if they help!
|