Creating a New Script
Connect Toolkit
Scripts direct your callers on what to say while on the phone or while knocking on doors. They include data points that can be used to easily collect data while having a conversation with a contact. Scripts can be used for volunteer recruitment, welcoming, mobilisation, or voter identification as well as many other things!
You can easily set up a script for different types of outreach by following these simple instructions. Here are links to a couple of example scripts you can use!
This is a very important step to ensure that callers know what to say while making phone calls or knocking on doors and to ensure that they know what data to collect. You can modify a script that has been shared with you by the central Party or you can choose to create a script from scratch!
1. Begin on the My Campaign or My Voters side of the database
- Begin on the tab that appropriately represents who you will be reaching out to.
- All contact with your volunteers, donors, members and other individuals your constituency has a relationship will be on the My Campaign side of the database.
- All contact with your voters will take place on the My Voters side of the database
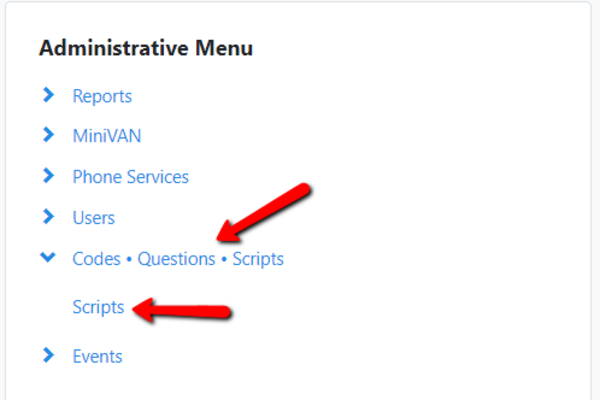
2. Finding your Scripts
From the Administrative panel, scroll down to Codes - Questions - Scripts and select Scripts.
This will bring you to the scripts page.
Follow the steps below if you already have a template script that you want to edit. If not, go to Step 7 to learn how to create a script from scratch!
- Find the desired script that you want to edit.
- Click on the script name in blue
3. Copying an existing Script
Click on Save As at the top right-hand corner of the screen.
- This will generate a copy of the script that you can adapt for your team while allowing you to always keep a clean copy for future reference
Give the copy a new name to personalise it to your team
- Name your script.
- The script can now be edited as required for your team.
4. Editing a Script to suit your campaign
Add script elements. There are various elements to choose from to build your script.
- Text: To add a text element, simply write in the text you would like to provide for canvassing. Click Add.
- Tag: To add a Tag, select the Tag you would like to use during the canvass from the drop-down menu under Tags. Click Add.
- Questions: To add a question, select the Question you would like to use during the canvass from the drop-down menu under Questions. Click Add.
- Volunteer Activity
- Event: To add an event, click Add and select the date and name of your event. If you will be using this script with MiniVAN, you will be able to input event statuses for your event attendees directly into MiniVAN.
Delete a Question or Tag by clicking on Delete (in blue) next to any of the Script Elements.
Edit a Text element by clicking on Edit (in blue) to change the text that is currently there.
5. Always check your desired phone results
Select the different walk/phone results that you would like to make available as responses on your script by ticking the box next to it.
- Only select the additional Phone / Walk results that you think your volunteers will need in order to successfully track results of their canvass. Your canvasser will be able to select the responses you choose from any canvassing sheet or Virtual Phone Bank that uses this script.
- You have to add the Do Not Call result to all Scripts you plan to use for phone calling.
- For phoning, we suggest that you also select “Busy”, “Refused”, “Wrong Number”, “Disconnected” and “Deceased”, as well as any other Phone Results that suit your project.
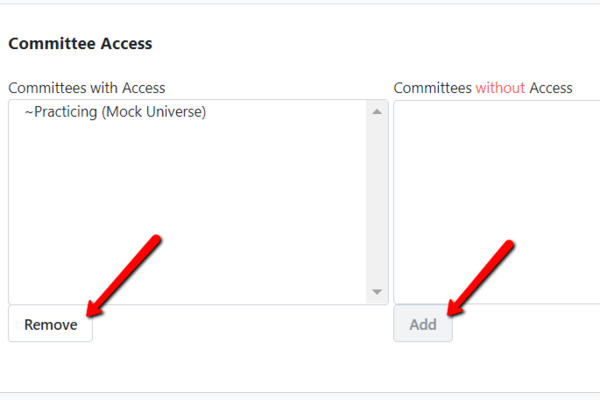
6. Sharing your Script
Choose the constituency(s)/local party(s) that can have access to your script by using the add and remove buttons.
If you have only been granted access to one local party, you will be able to share your script with only that party. If you have access to more than one local party, the names of all of your areas will appear and you may select which committee you want to give access to the script.
7. Creating a Script from scratch
Click Add New Script in the upper right-hand corner.

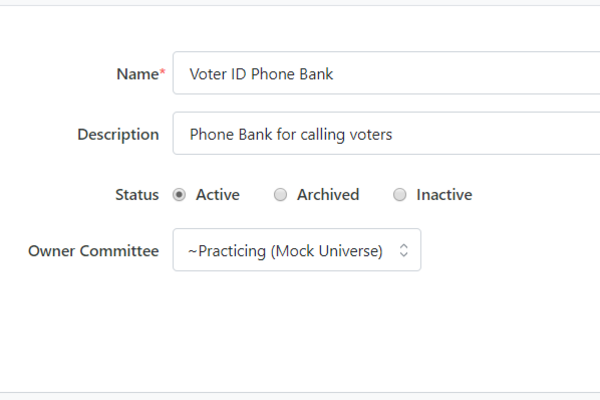
Give your script a name and description.
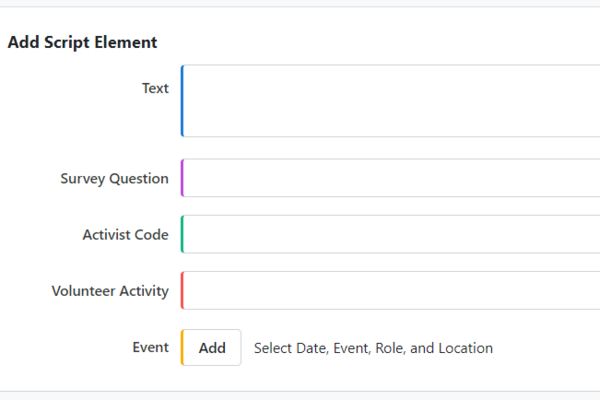
Under Add Script Element, you’ll have different options available to personalise your script. Begin building the script by inserting the different script elements and positioning them within the script by dragging the ‘five-lines’ icon beside the element you wish to move. You can also edit each section or delete it. Make sure to always click the Save button to save the order of your sections.
To add a text element: Simply write in the text you would like to provide for canvassing. Click Add.
If you would like to edit a text field, click Edit to go back to a particular section and modify it.

To add a Question, select the Question you would like to use during the canvass from the drop-down menu under Questions. Click Add.

To add a Tag, select the Tag you would like to use during the canvass from the drop-down menu under Tags. Click Add.

To add an event, click Add and select the date and name of your event. If you will be using this script with MiniVAN, you will be able to input event statuses for your event attendees directly into MiniVAN.


Select the different walk/phone results that you would like to make available as responses on your script. Only select the additional Phone/Walk results that you think your volunteers will need in order to successfully track results of their canvass. Your canvasser will be able to select the responses you choose from any canvassing sheet or Virtual Phone Bank that uses this script.
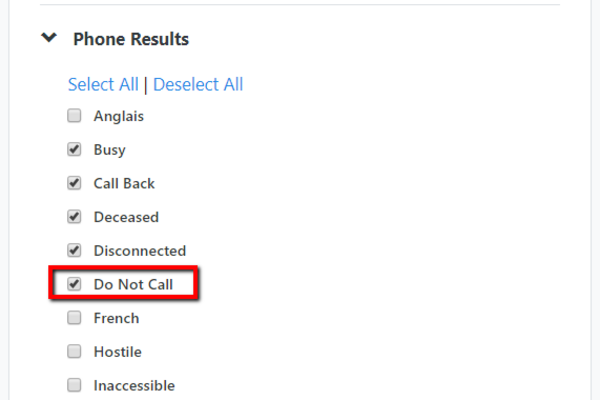
- It is best practice to always include Do Not Call in your phone script.
- For phoning, we suggest that you also select “Busy”, “Refused”, “Wrong Number”, “Disconnected” and “Deceased”, as well as any other Phone Results that suit your project.
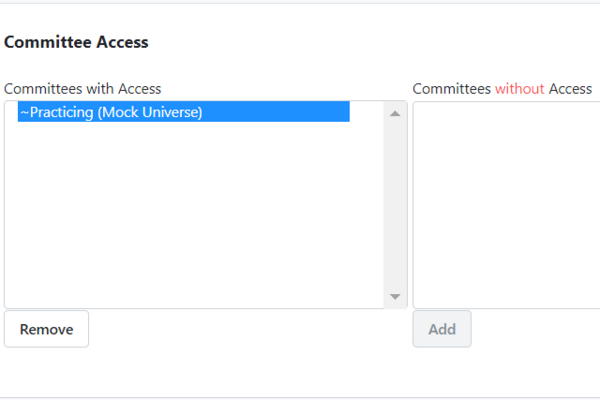
Choose the organisations that can have access to your script by using the add and remove buttons. If you have only been granted access to one organisation in your database, you will be able to share your script with only that organisation. If you have access to more than one organisation in your database, the names of all of your organisations will appear and you may select which organisation you want to give access to the script.
