Grid View & Script View
Connect Toolkit
Not all campaigns will have barcode scanners, but that doesn’t mean data entry has to take up a lot of your time. If you want to enter large amounts of canvass results but do not have a barcode reader, you can use either Grid View or Script View.
Grid View is great because it allows you to enter a lot of information into many records quickly, while Script View allows you to see the text of your entire script. The initial set up for both is very similar. We will concentrate here on Grid View as it is a lot more popular, but once you have gone through the steps below, you'll also be able to use Script View.
Your options for the data you can enter with either tool depend on the script you pick when starting the exercise. Make sure to use the same script for data entry that was used for canvassing so that you have access to all the right questions. You can start on either the My Campaign or My Voters side of the database depending on the type of data you are entering.

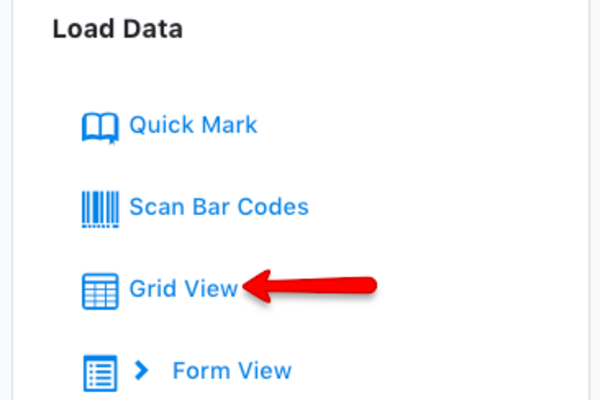
1. From the main menu, click on Grid View

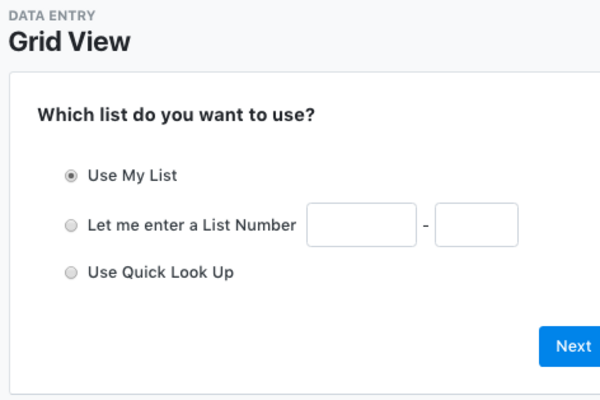
2. Select how you want to find the voters about whom you have collected data
You have the option to:
- Use My List to load the last list you created
- Enter the list number on the bottom of your canvass card (note that list numbers expire after 30 days)
- Use Quick Lookup to search for individuals instead of working from a list

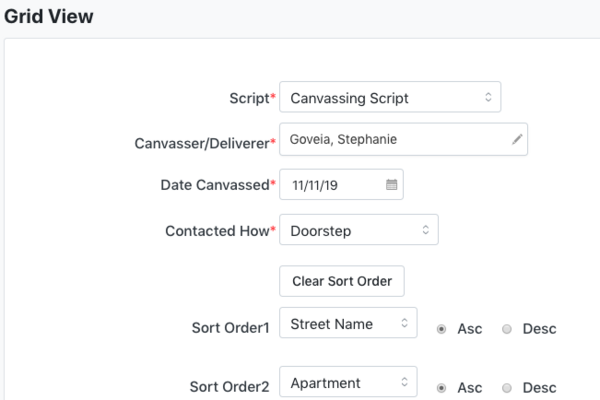
3. Setting up grid view
- Select the script: This is the same one used for the canvassing
- Enter the canvasser/deliverer: The name of the user that collected the data
- Date canvassed : When the data was collected
- The sort order: Depending on the list that you chose in the last step, default sort order settings will appear, you can come back and change them later if you find that the order of names on screen does not match those on your list
- Click Next
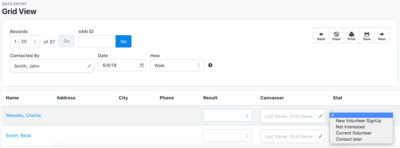
4. Enter the data you collected
- For each voter simply select the question responses from the drop down menus by clicking on each box in turn (or tabbing across them) to reveal the options
- If different canvassers did different houses, you can also record that here
- The cog in the middle of the screen allows you to go back and change the settings chosen in step 3
- The menu in the top left allows you to jump ahead to a different page if the paper stacked in front of you is not in order
- Click Save.

5. Adding phone numbers and email addresses
If you have information to enter on a profile that was not one of the answers included on the script (eg. phone number), you can click on an individual’s name to add information to any field on their profile and then click on Grid View in the top left hand ‘navigation trail’ to continue entering results from your canvass. But be careful! You must click Save before navigating away from the screen to an individual voter profile otherwise you may lose some of your work.
6. Saving your data
Click Save and Next to go to the next page to enter more data. Make sure you click save before you leave Grid View.

6. Adjusting the layout
You can make Grid View more user friendly by getting rid of any columns that you don't need. To do this click on the cog in the top right of the screen, then drag and drop the fields you want displayed from the bottom box to the top box and vice versa. You can also change the number of records displayed on each screen. The default is 20, but it can be handy to change this to the same as the number of records on each printed page. That way, as you go through each page in order, you'll see the same voters displayed on each screen.
Note: You will have 24 hours to edit or delete incorrect canvassing data. After that time, contact HQ.
