Setting Up a Virtual Phone Bank
Connect Toolkit
The purpose of this guide is to show you how to set up a Virtual Phone Bank (VPB) in Connect to more efficiently contact either voters or members. Using My Campaign to create member and supporter phone banks is a great place to start because:
- We should always have an upcoming event (either campaign, social or fundraising) to invite them to
- Engaging members makes them more likely to volunteer or donate in the future
- Member VPBs are an easy way to get new volunteers comfortable with using the phone
- We generally have phone numbers (and consent!) for almost all members
The Virtual Phone Bank tool allows you to enter data directly into the system as you make calls so saving the time you would have to spend doing data entry if you used paper.
Remember that if you are setting up a phone bank that will be calling voters, you need to take TPS registration into account (people who have signed up to the Telephone Preference Service opting out of marketing calls). There is a target pool for that, which we will explain later.
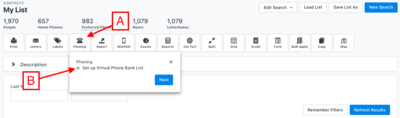
1. From the My List
A) Click on phoning icon
B) Click on set up virtual phone bank list
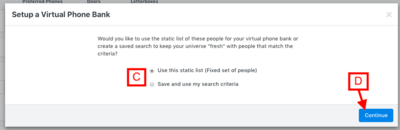
C) Determine whether to use your list as a Fixed list or a Saved Search
-
A fixed list: A list that will always contain the same people. This list can be used from the Create a List page to add or remove these people from future lists.
-
A Saved Search: A dynamic list that changes according to the criteria you selected. This list will constantly add or remove people as per the criteria you selected upon the creation of your list.
D) Click on continue
2. You will be brought to the VPB administration screen.
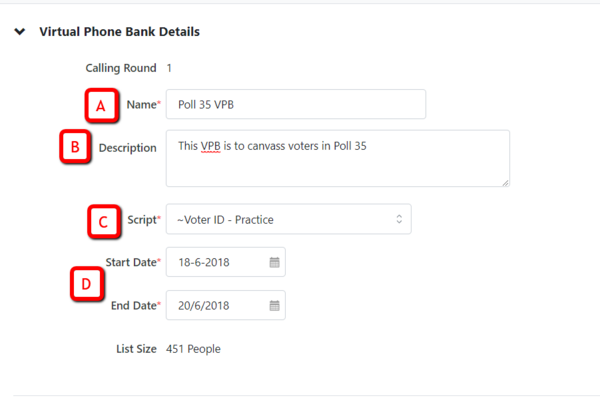
3. Enter the Virtual Phone Bank Details
A) Begin by giving your VPB a name
B) You may also add a description that includes the criteria of the list that you are using to make your calls.
C) Select the appropriate Script from the drop-down box.
D) Enter the dates that you want your phone bank to be available to callers.
4. Adding the Event Scheduler to your VPB
In My Campaign you can choose to allow your callers to schedule the people they contact for an event directly through the VPB. This is great for volunteer recruitment phone banks because you can easily schedule a volunteer for a training session or a volunteer activity directly within the phone bank.
Note that callers need to log into your local party organisation in order to use the event scheduler
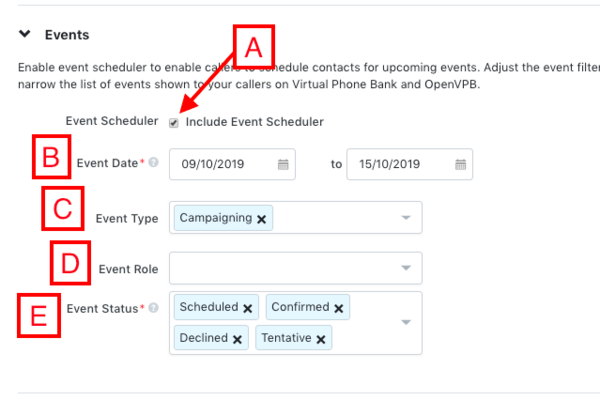
A) Tick the box next to Event Scheduler. Additional criteria will appear.
B) Enter the date range of the events that you want to be able to schedule volunteers for. Please note these dates need to be within a week.
C) Select the Event Types that you want to be able to schedule volunteers for.
D) Under Event Role, select Attendee/participant. This will ensure that all individuals that want to attend this event are marked as Attendee/participant.
E) In Event Status, select Scheduled. This will ensure all interested individuals get marked as scheduled.
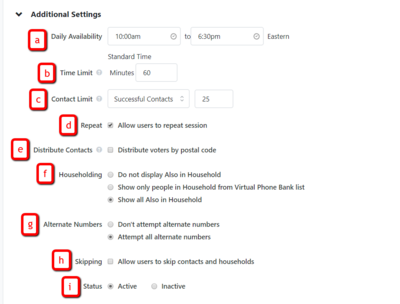
5. Set your Additional Settings
Many of these settings are optional but can be very helpful for running an effective phone bank
A) Daily Availability: Set this field to times that fall within the hours you feel are appropriate, it ensures that your callers are only making calls within a certain time frame, for example 9am to 9pm
B) Time Limit: You can set a time limit for your phone bank which regulates the amount of time your callers can spend making phone calls. This is helpful to prompt your volunteers to take a break if they have been making calls for a long time. It can also be useful if you are planning to constantly refresh or remake your phone banks, as you may plan to do on polling day, because it forces people to stop their existing phone bank and go back into a new one
C) Contact Limit: This feature will set a goal for your volunteers to reach in terms of successful contacts or attempts. Used in conjunction with the Progress Bar function, this feature can be used to encourage your volunteers to reach a target.
D) Repeat: If setting a time limit or a contact limit, it is a best practice to tick the Repeat checkbox. This will allow your callers to repeat a session so that they can continue making phone calls.
F) Householding:
- Do Not Display Also in Household: Use if you want each person in the household to get a call, regardless of whether they live with a person on your list who has already been called
- Show only People in Household from Virtual Phone Bank list: Use if you need an answer from each person on your list, but want to be able to canvass a whole household in one call whenever possible. This is perfect for calling members or for polling day, when you only really care about talking to those on your list
- Show all Also in Household: Use if you don’t mind who you talk to in the house and always want to be able to speak to whoever answers the phone - this is usual for canvassing
G) Alternate Numbers: Select Attempt Alternate Numbers and the system will display all the phone numbers that we have in the database for the person you are trying to reach. However, we can only use this if we know we have consent to do so. Generally it can be used for members and supporters, but not for voters. Among ordinary voters, the mobile number is set as the default because that is much less likely to be TPS registered than the landline (see below)
H) Skipping: Skipping allows your callers to skip a household or contact so that they do not have to make that call if they feel uncomfortable doing so
I) Status: Set the status to Active!
6. Display Settings
Displaying certain information is important but too much can be overwhelming for volunteers. You should consider the following settings:
- Age and Sex: This will give your caller a better idea of who they are talking to
- Preferred phone: This will allow your callers to see what an individual’s preferred phone number is set as. It is always a good idea to display these settings so you can confirm that these are good ways to reach them.

In the Editable Contact Section you can make Phones and Emails editable if you want your callers to check they are up to date. It is worth doing if your callers are local volunteers, but Connect users from outside the area won't have the access to edit this kind of data. The same issue arises with the Notes field. All callers will be able to enter notes if you make the field available, but you will only have access to Notes applied by users logged into your local party organisation when they made the calls. As such it is usually best to switch off the Notes field because otherwise callers may record casework they expect to be actioned without knowing that you won't be able to see it. For casework it is recommended that you give callers an email address to send important notes to instead.
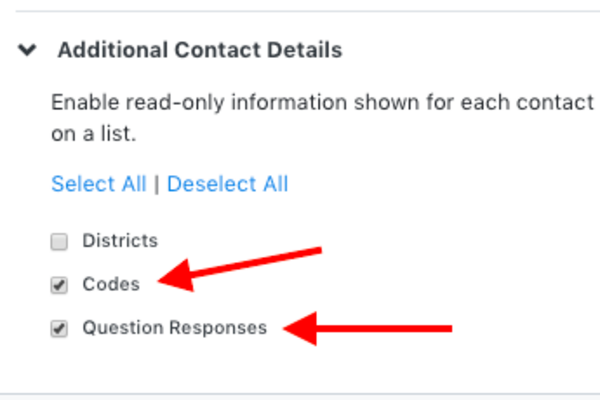
Displaying Question Responses: These are not necessary but can be added. They will display data points that allow your caller to see their support in previous elections or any issues they care strongly about, or volunteer tasks they have accepted in the past
- When creating a phone bank on the My Voters side of the database it is generally discouraged to display past Question Responses because they can show information which could bias a caller or make them uncomfortable making the call

Progress Bar: This is a great feature that allows your callers to see how well they are progressing through their Virtual Phone Bank. You can choose to include an individual progress bar and a progress bar for the entire team.
- Remember: If you had set a Contact Limit, the individual progress bar will show how well a volunteer is progressing towards their contact limit. This encourages your volunteer as they make calls!
- Only make the entire phone bank progress bar available if the list is small and manageable. If the list is too long and the progress bar indicates slow progress, this can be discouraging!
7. Create your Phone Bank!
Scroll up to the top of the page and click on Save and Preview once all your criteria have been selected.
Your phone bank is now created and pop up box will appear to show you what it will look like. This is a good time to check the script reads as intended.
8. Sharing your Phone Bank
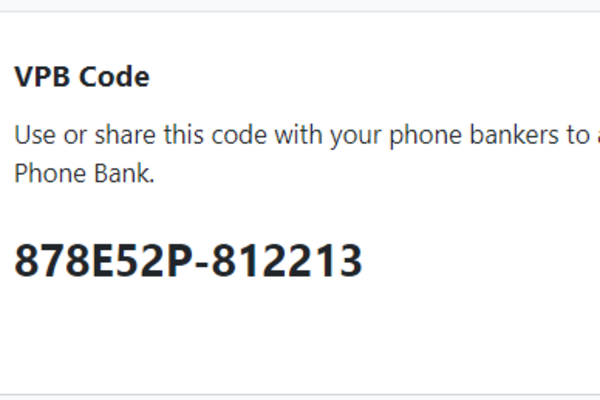
- You have various options to share your VPB
- You can provide your volunteers with the code that they can type into Connect. This is useful if you have volunteers from across the country willing to help
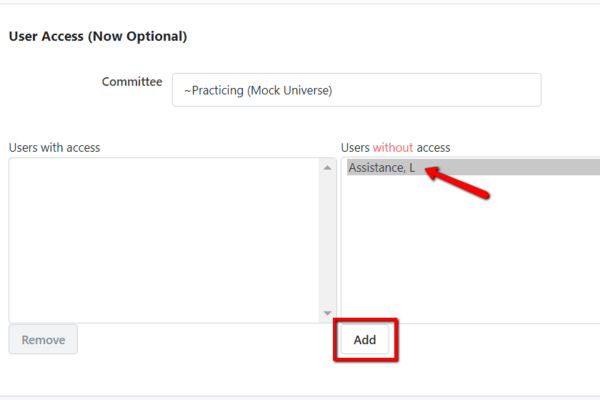
- Share your VPB by scrolling down to the User Access Section. Highlight the names of the users you want to give access to and click Add. They will become User with Access. The VPB will now appear in their list of available VPBs during the time window you have specified in the settings
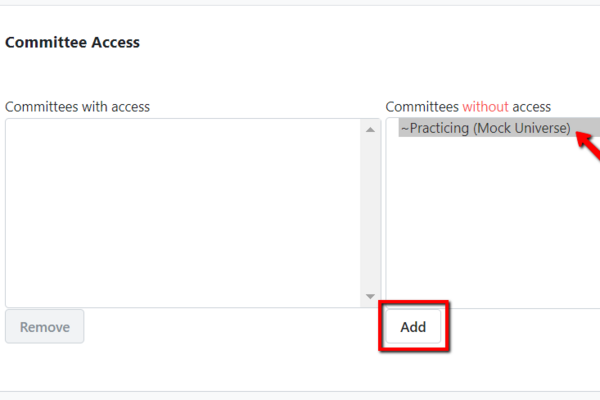
- Share your VPB by scrolling down to the Party Organisation Access Section and click on your constituency party organisation. Click Add so that all users in your local party organisation will be able to see the VPB
The Telephone Preference Service (TPS)
The Telephone Preference Service (TPS) is a service that maintains the official telephone opt out list for the UK. Individuals can volunteer to be placed on this list in order to register their intention to opt out of all unsolicited marketing calls from all organisations. The TPS applies to all organisations including political parties. TPS data is available in Connect in the target pools tab of Create a List. A person should be suppressed from all calls within 28 days of requesting to opt out, so your phone banks should not be set up to last for more than that time.
It is important to use these target pools to ensure that you are not calling individuals that have clearly expressed that they do not want to be contacted by us.
The TPS is managed using the following target pool sub-groups:
- TPS : Phone consent given - This number may be on the TPS list but the individual has given us consent to call them overriding their TPS status (via a survey question response)
- TPS : Both Landline and Mobile TPS Registered - List of people that we cannot call because both their landlines and mobiles have been registered with the TPS
- TPS : Landline Only TPS Registered - Only the landline number for this person has been registered with the TPS. Can be used to make calls to their mobile number if they have one
- TPS : Mobile Only TPS Registered - Only the mobile number for this person has been registered with the TPS. Can be used to make calls to their landline, if they have one
- TPS : Not TPS Registered - The individuals that we can call if we have a phone number for them
You can always use the ‘Phone consent given’ and the ‘Not TPS registered’ target groups when setting up phone banks (remember to use the Phones tab to specify all phone number types except Fax and to ensure that the Do Not Call option under the Suppressions tab remains selected).
You can also add a second step to your search to include the ‘TPS : Landline only TPS Registered’ group and then just select Mobile WITH 'Preferred Phones Only' checked from the Phones tab, but if you do, then you MUST NOT include the option to ‘Attempt Alternate phone numbers’ when generating your Virtual Phone Bank. Mobile numbers are set as the default preference for most records because they are a lot less likely to be TPS registered in the first place.