Updating Postal Vote Lists
Connect Manager Essentials
This guide will show you how to upload postal vote lists to Connect. HQ does not manage postal vote lists on Connect as part of the monthly register update process; they need to be updated by local parties
These can be obtained from local councils, or Valuation Joint Boards in Scotland, by your Designated Nominating Officer. You should obtain the up to date postal vote list after every register update
Postal voters can be found in Create a List under the Voting tab. You may wish to save a list of current postal voters before uploading a new list
Step 1: Clear Postal Votes
Before uploading a postal vote list, you may want to clear the existing postal vote list held on Connect. This isn’t strictly necessary every single update, but you will want to do so if you haven’t in a while, or the postal vote list changes are significant
To clear postal votes go to https://tech.libdems.org.uk/connect/submit-a-request-to-clear-postal-voters. You should select either a local authority or Westminster constituency to clear. Please do not select both, as that will confuse the process. Requests will be actioned within 2 working hours
Step 2: Format your postal vote file
Before uploading to Connect, it is best practice to make sure your postal vote file is well formatted for upload. These are steps you should follow
- Check that the file name only contains letters and numbers, and not any symbols. Connect does not accept file names that contain symbols for Bulk Upload
- Delete redundant columns. All you need to bulk upload is the polling number and ballot type (if your file contains Postal, Proxy, and Postal/Proxy in one file). If your file contains multiple local authorities (as some files in Scotland will), a local authority column is also necessary. Removing redundant columns lowers the chance of bad values tripping up the bulk upload
- Ensure that Polling District and Polling Number are in two separate columns. If they are not, you can split them using the “Text to Columns” feature in Excel, delineating on the “-” symbol. A guide to this feature can be found at https://support.microsoft.com/en-us/excel/get-started/split-text-into-different-columns-with-the-convert-text-to-columns-wizard
Step 3: Upload the file to Connect
Now that you have a fully formatted file, you can upload it to Connect. This requires you to be a Deputy Constituency Connect Manager or above to upload
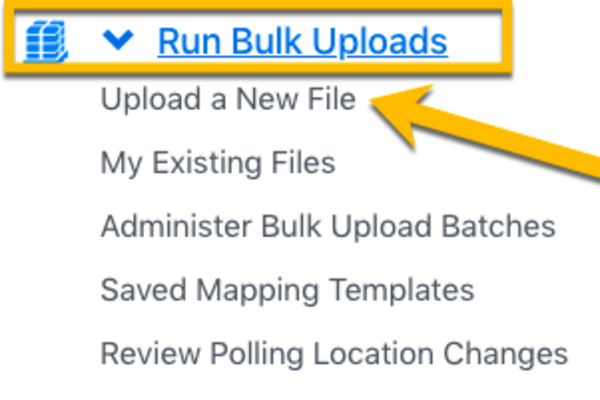
To upload your file, click on ‘Run Bulk Uploads on the Main Menu then click ‘Upload a New File’.
Click on ‘Choose File’ and navigate to your data file and tick the box to indicate if your data file has a header row. When you are ready, click ‘Next’.
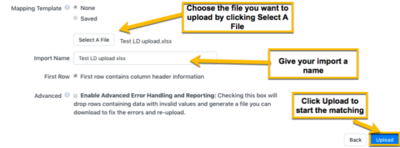
Your file will be uploaded for processing, and a sample of the data will be displayed.
Note: It is NOT advised that you use the "Advanced Error Handling and Reporting" option as this will not tolerate files with significant numbers of blank cells
Step 4: Mapping the file and completing the upload
To match the records, you need to select Polling Number in the ‘Apply New Mapping’ drop down menu as the first step
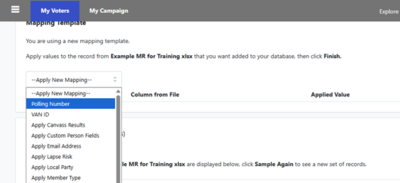
If you select Polling Number, you will need to enter the name of the Local Authority, then select the columns that contain the Polling District and Poll Numbers. If there are multiple local authorities in your file, you will need to select Choose Column in Data file under local authority, then map the local authority column in your file
Note: If you fail to complete this step before apply other mappings then your upload will fail
Next you need to go to the ‘Apply New Mapping’ drop down menu again, and select Apply Postal / Proxy Vote Data
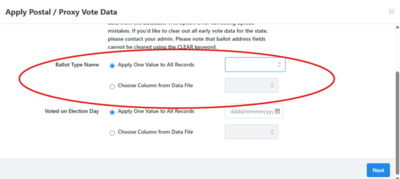
In this menu, ignore the other options and focus on Ballot Type Name. If your file only contains one type of ballot, you should select to Apply one value to all records. If there are multiple, you should select Choose Column from Data File, and select the column that specifies data type. Please note that we do not generally make a distinction between permanent and temporary postal votes, you should map all of your file onto whichever one your local party has been already using
Once you have selected all the data you want to upload, click Finish.
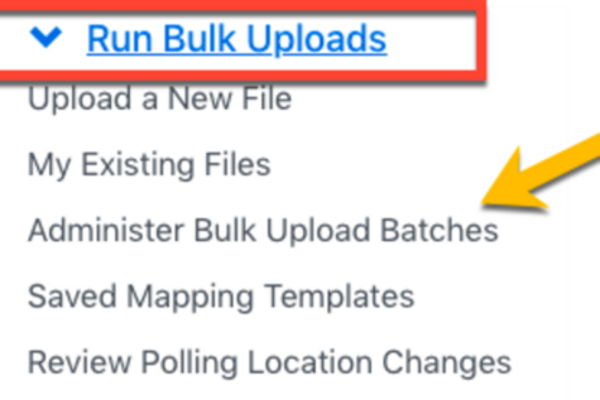
Return to the Main Menu, click Run Bulk Uploads, and then click ‘Administer Bulk Upload Batches’.
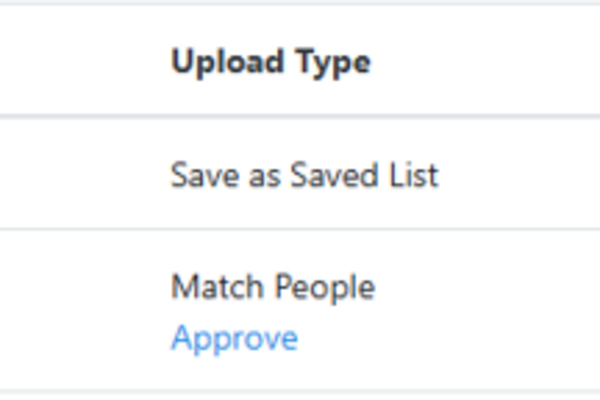
You should then see your upload on the screen
You need to click on the blue “Approve” link below “Match People” - if there isn’t a link, wait a minute or two then click refresh. The larger your file is, the longer it will take for the link to appear. If you upload a file that has more than 100,000 records, VAN will hold the upload for manual approval, which can take a few hours.
Connect will show you how many of the uploaded records it has matched to voters in the database. You can then choose to export back out the records that did not match if you want to try and work out why that was the case. They may include people who have moved or aren't in Connect because they appeared on the register very recently or because they live abroad. If the number is very high, it is likely that there is something wrong with your file so you should cancel the upload and inspect your input file more closely